Desktop GUI
pathotypr includes a native desktop application built with Tauri. It wraps the same pathotypr-core engine as the CLI, so every workflow produces identical results — just with drag-and-drop, live progress, and interactive tables.
Get the app
Download a ready-built installer — you do not need to compile anything. Installers for macOS, Linux and Windows are published with every release:
| Platform | File |
|---|---|
| macOS (Apple Silicon) | Pathotypr_<version>_aarch64.dmg |
| macOS (Intel) | Pathotypr_<version>_x64.dmg |
| Linux | .deb, .rpm or .AppImage |
| Windows | Pathotypr_<version>_x64-setup.exe |
See Installation for every bundle, and for the first-launch note on macOS and Windows.
Building is only for developers
Everything below describes building the app from source. You only need it if you are modifying pathotypr itself — to use the app, download an installer above.
Features
- All five workflows: train, predict, classify, split-fastq, match
- Drag-and-drop file selection
- Interactive result tables with sorting and filtering
- Real-time progress bars with cancellation support
- Training summary card (accuracy, OOB, CV metrics, model size)
- Genotyping views: resistance matrix, lineage composition, depth-vs-allele-fraction scatter
- Live CPU/RAM usage indicator
- Light and dark themes
- Excel export written alongside the TSV output
- Configurable parameters with sensible defaults and reset buttons
Using the app
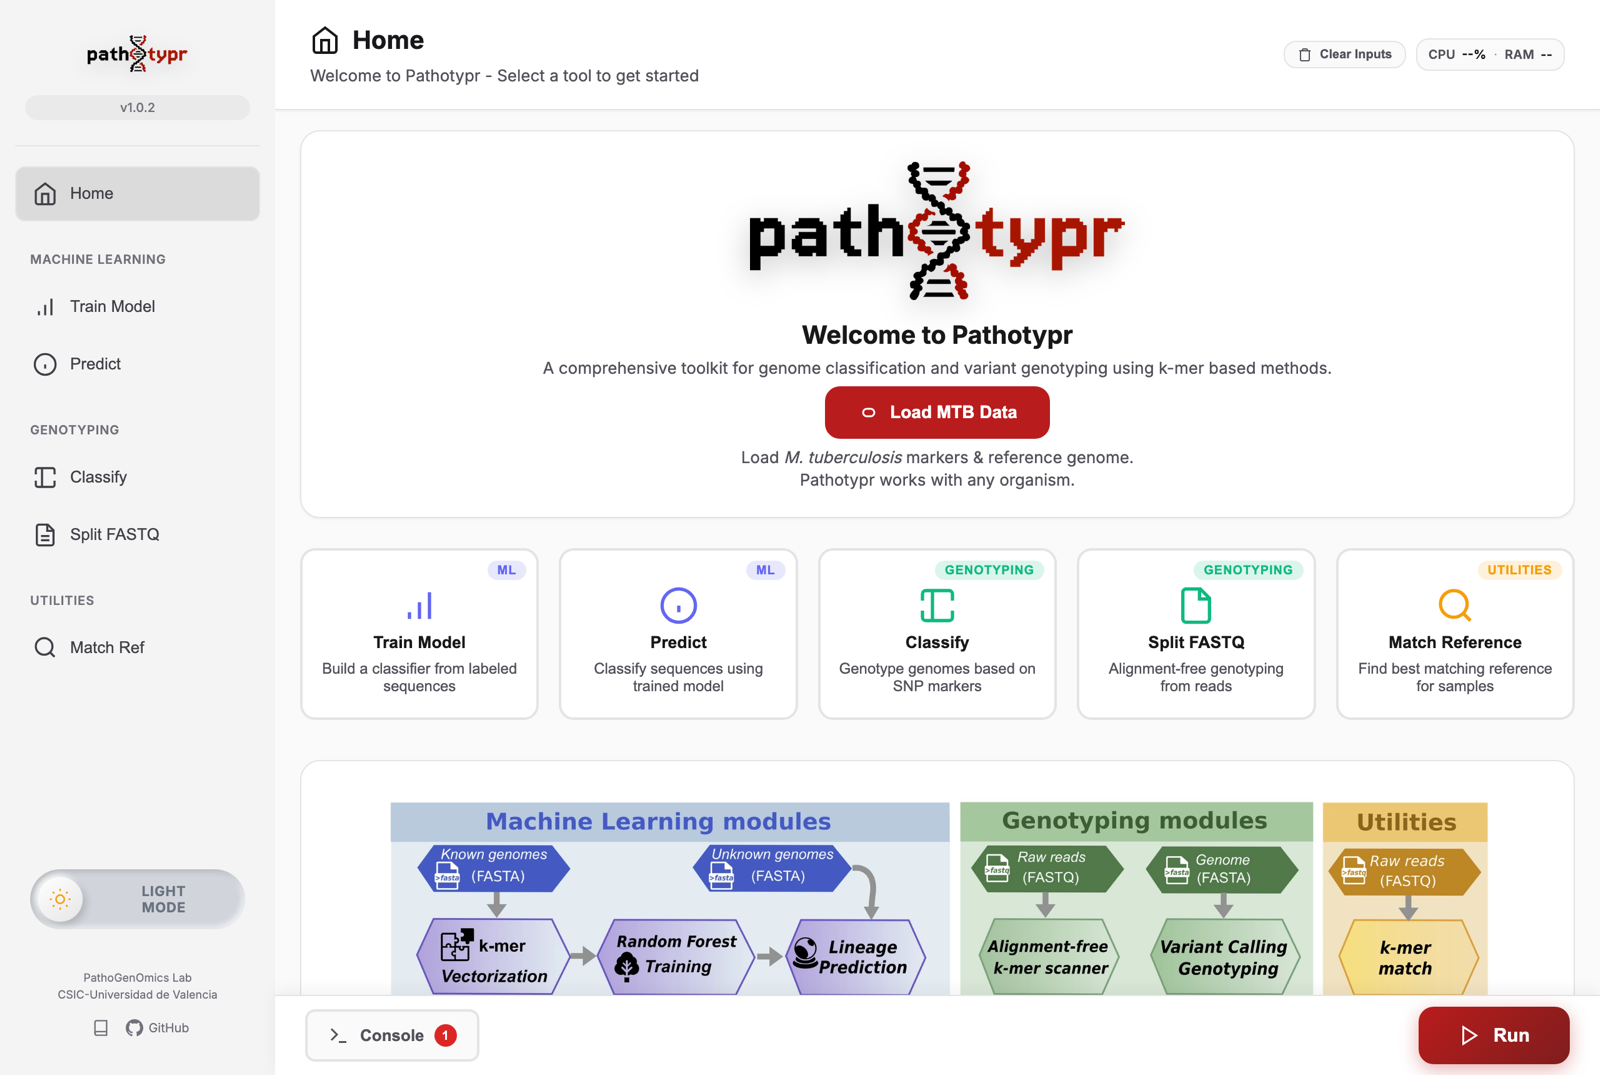
Every workflow uses the same window. The sidebar picks one of the five commands, grouped as machine learning, genotyping and utilities; the form in the middle collects exactly what the corresponding command takes as flags; and the run button, the progress bar and the console sit along the bottom.
Getting the reference data
Load MTB Data downloads the marker panels, the pre-trained model and the MTBC ancestor reference, and fills them into every panel that needs them. It resolves the newest published version of the Zenodo deposit at download time, so the app keeps working when the catalogue is updated. The Classify and Split FASTQ panels also have Lineage Markers and DR Markers buttons that fetch one panel at a time.
If you already have the files — from Getting started, for instance — drag them onto the fields instead. The app never needs the files to come from Zenodo.
Genotyping an assembly
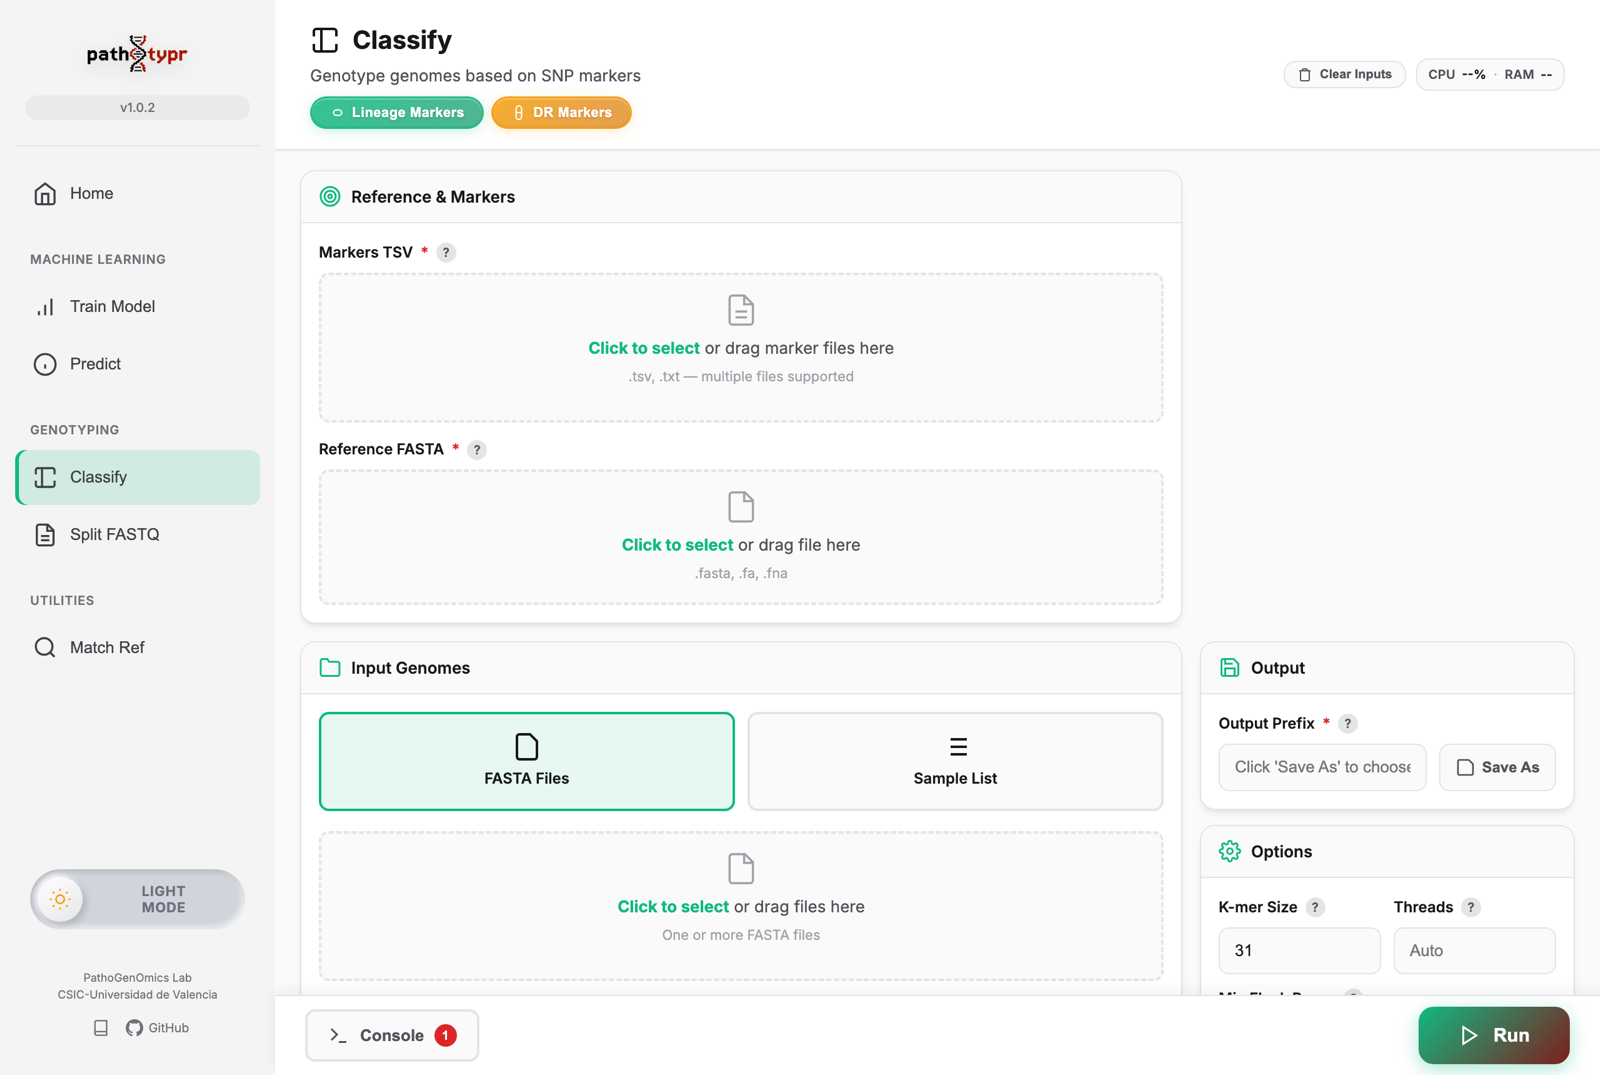
- Drop the marker TSV on Markers TSV and the ancestor genome on Reference FASTA. Both are filled for you if you used one of the download buttons.
- Drop your assemblies on Input Genomes, or switch to Sample List to pass a file listing them.
- Set Output Prefix with Save As.
- Adjust Options if you need to; the defaults match the CLI defaults.
- Press Run.
Files are routed to the field you drop them on, and the field under the cursor is
highlighted while you drag. Dropping on empty space routes by extension instead, and
when an extension fits more than one field — .fasta fits both the reference and the
samples — the app says so and leaves the file for you to place, rather than guessing.
Genotyping reads
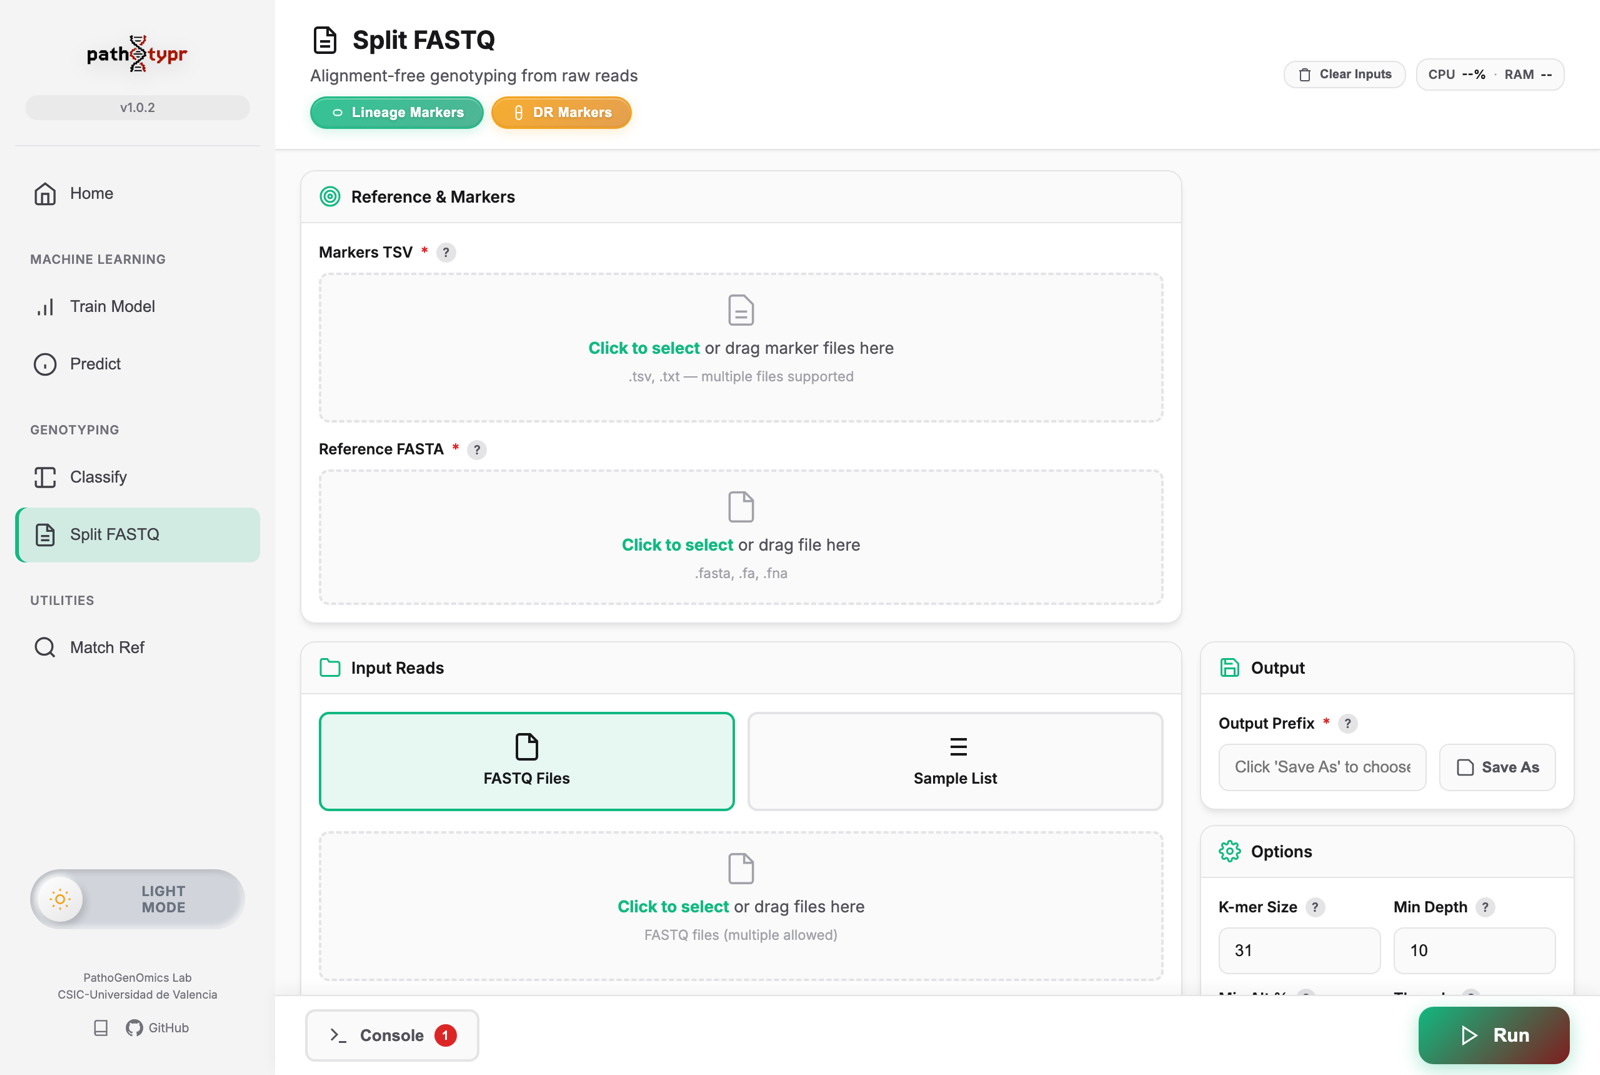
Same shape, with FASTQ input. Paired files are detected from their names (_R1/_R2,
_1/_2, .1/.2), and Min Depth and Min Alt Percent are the read-level
thresholds described in split-fastq.
Reading the results
When a run finishes the results open below the form: a paginated, filterable table of the output TSV, and charts appropriate to the workflow — lineage composition, a resistance profile for a drug-resistance panel, or match scores. The console drawer keeps a timestamped log, and output paths in it are clickable.
The files themselves are written exactly where the CLI would write them, with the same
names, and an .xlsx copy alongside if you tick the Excel option.
The same run on the command line
Every field is one flag. The GUI is a front end to the same engine, so a run set up in the app is a run you can script:
| Field in the app | Flag |
|---|---|
| Markers TSV | -m, --markers |
| Reference FASTA | -r, --reference |
| Input Genomes / FASTQ files | -i, --input |
| Sample List | -l, --input-list |
| Output Prefix | -o, --output-prefix |
| K-mer Size | -k, --kmer-size |
| Threads | -t, --threads |
| Min Depth | --min-depth |
| Min Alt Percent | --min-alt-percent |
| Nested classification | --nested-classification |
| Excel output | --excel |
Use the CLI for anything repeated
The app is built for looking at one run closely: setting it up, watching it, and
reading the tables and charts it produces. Batches, cluster jobs, pipelines and
anything you need to reproduce months later belong on the command line, which is
documented per command under Commands and is the reference
implementation. Both call the same pathotypr-core, so results are identical.
Building from source
Only needed to modify pathotypr itself — see Get the app to just use it.
Prerequisites
- Rust — a recent stable toolchain (install via rustup).
-
Tauri CLI v2:
Must be the 2.x CLI
pathotypr targets Tauri 2. A
tauri-clifrom the 1.x series already on yourPATHwill fail to build this project. Confirm your version withcargo tauri --versionbefore continuing. -
System dependencies — these vary by platform:
These are the 4.1 packages
Tauri 2 links against the 4.1 WebKitGTK / JavaScriptCore packages. The older
4.0variants (all that some distributions, e.g. Ubuntu 20.04, ship by default) will not work — use a newer release or a backport that provides the4.1packages.The Xcode Command Line Tools are usually pre-installed. If they are missing, install them with:
The WebView2 runtime is required. It is pre-installed on Windows 11 and most up-to-date Windows 10 machines. If it is missing, install the Evergreen runtime from Microsoft.
Development
Opens the app in development mode. The frontend is plain static files with no dev server, so front-end edits need a webview reload rather than arriving by hot reload.
First build is slow
The initial cargo tauri dev compiles the full Rust dependency tree and can
take several minutes. Subsequent runs are incremental and start quickly.
Production build
With targets: "all" (set in tauri.conf.json), this produces distributable
installers under target/release/bundle/ (the workspace-root target/, not src-tauri/target/):
- macOS:
.dmginbundle/dmg/(and the.appinbundle/macos/) - Linux:
.debinbundle/deb/,.rpminbundle/rpm/, and.AppImageinbundle/appimage/ - Windows:
.msiinbundle/msi/and the NSIS.exeinbundle/nsis/
Builds are unsigned
Neither the published installers nor binaries you build yourself are signed with a paid developer certificate, so macOS Gatekeeper and Windows SmartScreen will warn you the first time you open them. See the first-launch notes on the Installation page for how to get past the warning.
Architecture
src-tauri/
├── src/
│   ├── main.rs       # Tauri app setup
│   ├── commands.rs   # Tauri command handlers (bridge GUI → core)
│   ├── state.rs      # Task state, cancellation + progress events
│   └── util.rs       # Path validation, SSRF guard, system usage
├── Cargo.toml
└── tauri.conf.json

frontend/
├── index.html        # Main page layout (loads js/main.js as a module)
├── styles.css        # Styling
└── js/
    ├── main.js       # Initialization
    ├── forms.js      # Form submission handlers
    ├── results.js    # Result table rendering
    ├── visualization.js  # Charts + summary cards
    ├── progress.js   # Progress bars + cancellation
    ├── config.js     # Default parameters
    ├── state.js      # Run state management
    ├── navigation.js # Tab navigation
    ├── dropzone.js   # Drag-and-drop file handling
    ├── console.js    # Log console drawer
    ├── tauri.js      # Tauri API wrappers
    ├── theme.js      # Light/dark theme toggle
    ├── utils.js      # Shared utilities
    ├── dr-insights.js      # Resistance profile, lineage levels, allele fractions
    └── genotype-charts.js  # Resistance matrix, lineage composition, QC scatter
How it works
- Frontend collects form parameters and sends them to Tauri via
invoke() commands.rsdeserializes parameters and callspathotypr_corefunctions- Core library runs the workflow while
commands.rsemits progress events back to the frontend - Results are displayed in interactive tables and summary cards
- Cancellation token allows stopping any running workflow via the UI
See also
- Installation — pre-built desktop installers for macOS, Linux, and Windows
- Input formats — accepted assemblies, reads, and marker files
- Command references: train · predict · classify · split-fastq · match